Video + Pictures of Disassembly Below
My iMac (7.1, 2008) crashed one month after the warranty expired. Of course they wouldn't make any exceptions, even if their computer's are supposed to be high quality. So I bought a Western Digital Caviar Black, 1TB to replace the 300 GB WD Caviar Blue (see below for more hard drive links).
Since I purchased this hard drive from a reseller, I have a three year warranty. The hard drive in the iMac was a Western Digital, but was not covered by the company because the warranty is only through Apple.
Compatible Replacement Hard Drive Info
Compatible replacement / upgrade hard drives for your Intel iMac (2006-Present).
SATA (1.5 gb/s) or SATA II (3 gb/s)
7200 or 10,000 rpm
32MB or 64MB Cache
I recommend a Western Digital Caviar Black hard drive because it comes with a 5 year warranty, and it runs great. There is also Caviar Blue for a replacement, or a Caviar Green to save energy (and money); both are by Western Digital.
I don't really mess with Seagate, although I do have a refurbished 7200 rpm SATA drive in a PC that's about 3 years old and hasn't given me any problems.
Hitachi makes a great product, one of the most reliable names on the market. It's common for a company to use a Hitachi hard drive in their product for this reason (an external backup drive, for example). The quality is reflected in the price.
Recommended Hard Drives
Hand picked hard drives based on: best price, quality, warranty, performance. I only included products that will match or exceed your previous performance. Please share you favorite hard drives, and how your recent upgrade performs in the comment section at the end of this post.
NOTE: Adblock users must allow assoc-amazon.com to see amazon.com recommendations below.
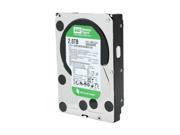

Western Digital Caviar Green 2TB 3.5" SATA 3.0Gb/s 64MB Cache -3 year warranty- Internal Hard Drive -Bare Drive - $109.99
Western Digital Caviar Green 500GB 3.5" SATA 3.0Gb/s Internal Hard Drive $54.99 + FREE SHIPPING by Newegg.com
Western Digital Caviar Black 640GB 3.5" SATA 3.0Gb/s Internal Hard Drive $64.99 + FREE SHIPPING by Newegg.com

Western Digital Caviar Black 750GB 3.5" SATA 3.0Gb/s Internal Hard Drive $79.99 + FREE SHIPPING by Newegg.com
Western Digital Caviar Black 1TB 3.5" SATA 3.0Gb/s Internal Hard Drives $94.99 + FREE SHIPPING by Newegg.com
3TB Hard Drives!
ATTENTION! THIS DRIVE FOR SNOW LEOPARD OR BETTER ONLY. 32 BIT PLATFORM CANNOT USE THIS HARD DRIVE... YOU'VE BEEN WARNED!
From Newegg.com

From Amazon.com
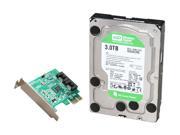
Western Digital 2500 GB Sata 3.0 Gb-s 64 MB Cache 3.5-Inch Internal Bare-oem Drives WD25EZRSDTL
Video Guide
NOTE: Adblock users must allow assoc-amazon.com to see amazon.com recommendations below.
Western Digital Caviar Green 2TB 3.5" SATA 3.0Gb/s 64MB Cache -3 year warranty- Internal Hard Drive -Bare Drive - $109.99
Western Digital Caviar Green 500GB 3.5" SATA 3.0Gb/s Internal Hard Drive $54.99 + FREE SHIPPING by Newegg.com
Western Digital Caviar Black 640GB 3.5" SATA 3.0Gb/s Internal Hard Drive $64.99 + FREE SHIPPING by Newegg.com
Western Digital Caviar Black 750GB 3.5" SATA 3.0Gb/s Internal Hard Drive $79.99 + FREE SHIPPING by Newegg.com
Western Digital Caviar Black 1TB 3.5" SATA 3.0Gb/s Internal Hard Drives $94.99 + FREE SHIPPING by Newegg.com
3TB Hard Drives!
ATTENTION! THIS DRIVE FOR SNOW LEOPARD OR BETTER ONLY. 32 BIT PLATFORM CANNOT USE THIS HARD DRIVE... YOU'VE BEEN WARNED!
From Newegg.com
From Amazon.com
Western Digital 2500 GB Sata 3.0 Gb-s 64 MB Cache 3.5-Inch Internal Bare-oem Drives WD25EZRSDTL
Video Guide
iMac hard drive removal (upgrade/replace) pt 1
iMac hard drive removal (upgrade/replace) pt 2
iMac hard drive removal (upgrade/replace) pt 2
High Resolution Pictures
Ingredients: Household suction cups, torx screw driver size 8 (set shown), and my Leopard iMac 20"

8 Screws under the screen cover. Torx size 8.

Remove the screws mentioned above, removed the chrome, and you'll see this.

8 screws attaching the monitor to the chassis

(Left to Right) Speaker, circulation fan, RAM, cpu heat sink (I think)

For those of you who forget to mark your monitor cables, this is for you.

First set of cables, looking from the top of the iMac.
Each wire is attached in just below the cd drive.
The wire closest to the outside of the cd drive should be connected
to the dark colored cable from the monitor.
I marked one cable on both ends of the connection with a Sharpie pen.

Second set of cable looking from the side of the iMac you put your CD's into.
For these cables, look in the tight space next to the cd drive. Find the cable that is attached the furthest away from the cd drive. In the picture below, it's the cable furthest to the left. This cable should be attached to the lighter colored cable that comes from the monitor.


This is a picture of the board that the cables are attached to. It is visible by removing the CD Drive. The left most wire is from the last picture. It should be attached to the light colored cable from your monitor. The rightmost cable is from first cable photo (two pictures back) and attaches to the darker cable from your monitor.


This is a picture of everything connected straight into the monitor. The wires are in the same order as above, but the rectangle shaped board is flipped over, the way it would normally sit.


Monitor rear. LG Philips. Make sure the ribbon cable is connected evenly, then run a good piece of tape over the seam where it connects to the monitor (past both ends) to make sure it stays. If your monitor seems 'off' in any way after installation, this is most likely the problem.

The plug on the left (closest to RAM) will need to be disconnected to removed monitor. Reads "LCD TEMP"

Money shot. Good time to dust it out. The cd drive is on the left of this picture. Remove the tape, take out the two screws that connect it to the chassis, remove the two small screws (size 7?) from the rear connector, remove the thermometer. From there you can open the case to remove a badly jammed disc. Remember: if you don't attach the thermometer good the computer will beep when you boot.

The center of the board on the left has a message: CAUTION HIGH VOLTAGE with a symbol next to it. DO NOT TOUCH THAT PART OF THE BOARD WITH ANYTHING. It contains a small stored charged of electricity that is present even when the computer has been unplugged for hours. I touch it with a screw drive and an angry blue spark jumped out at me. Good thing it didn't arch to another spot on the board!

Hard drive thermometer close up, one side is flat, the side shown below is curved. Attach it with the flat side down. Use high temp computer adhesive or some good tape.
I had a request for thermal adhesive information to here is an example:
This product is for your CPU but will also work here. Feel free to find your own high temp, non permanent adhesive (preferably not electrically conductive).

Now opening THIS will void your warranty. As for the rest of the Mac, clean off your finger prints, and save the old hard drive in case you have to fill the warranty. If you do have to fill the warranty, then just put the old hard drive back, attach the thermometer with some real high temp computer adhesive, and swear to God you never touched it.

Yes, it will turn back on if you take care to put everything back properly. The 'beeps of death' made me think I broke my imac. It was actually just the hard drive thermometer not attached well.