Video + Pictures of Disassembly Below
My iMac (7.1, 2008) crashed one month after the warranty expired. Of course they wouldn't make any exceptions, even if their computer's are supposed to be high quality. So I bought a Western Digital Caviar Black, 1TB to replace the 300 GB WD Caviar Blue (see below for more hard drive links).
Since I purchased this hard drive from a reseller, I have a three year warranty. The hard drive in the iMac was a Western Digital, but was not covered by the company because the warranty is only through Apple.
Compatible Replacement Hard Drive Info
Compatible replacement / upgrade hard drives for your Intel iMac (2006-Present).
SATA (1.5 gb/s) or SATA II (3 gb/s)
7200 or 10,000 rpm
32MB or 64MB Cache
I recommend a Western Digital Caviar Black hard drive because it comes with a 5 year warranty, and it runs great. There is also Caviar Blue for a replacement, or a Caviar Green to save energy (and money); both are by Western Digital.
I don't really mess with Seagate, although I do have a refurbished 7200 rpm SATA drive in a PC that's about 3 years old and hasn't given me any problems.
Hitachi makes a great product, one of the most reliable names on the market. It's common for a company to use a Hitachi hard drive in their product for this reason (an external backup drive, for example). The quality is reflected in the price.
Recommended Hard Drives
Hand picked hard drives based on: best price, quality, warranty, performance. I only included products that will match or exceed your previous performance. Please share you favorite hard drives, and how your recent upgrade performs in the comment section at the end of this post.
NOTE: Adblock users must allow assoc-amazon.com to see amazon.com recommendations below.
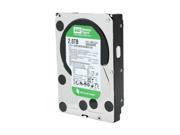

Western Digital Caviar Green 2TB 3.5" SATA 3.0Gb/s 64MB Cache -3 year warranty- Internal Hard Drive -Bare Drive - $109.99
Western Digital Caviar Green 500GB 3.5" SATA 3.0Gb/s Internal Hard Drive $54.99 + FREE SHIPPING by Newegg.com
Western Digital Caviar Black 640GB 3.5" SATA 3.0Gb/s Internal Hard Drive $64.99 + FREE SHIPPING by Newegg.com

Western Digital Caviar Black 750GB 3.5" SATA 3.0Gb/s Internal Hard Drive $79.99 + FREE SHIPPING by Newegg.com
Western Digital Caviar Black 1TB 3.5" SATA 3.0Gb/s Internal Hard Drives $94.99 + FREE SHIPPING by Newegg.com
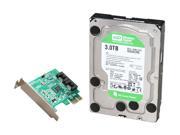
3TB Hard Drives!
ATTENTION! THIS DRIVE FOR SNOW LEOPARD OR BETTER ONLY. 32 BIT PLATFORM CANNOT USE THIS HARD DRIVE... YOU'VE BEEN WARNED!
From Newegg.com

From Amazon.com
Western Digital 2500 GB Sata 3.0 Gb-s 64 MB Cache 3.5-Inch Internal Bare-oem Drives WD25EZRSDTL
Video Guide
NOTE: Adblock users must allow assoc-amazon.com to see amazon.com recommendations below.
Western Digital Caviar Green 2TB 3.5" SATA 3.0Gb/s 64MB Cache -3 year warranty- Internal Hard Drive -Bare Drive - $109.99
Western Digital Caviar Green 500GB 3.5" SATA 3.0Gb/s Internal Hard Drive $54.99 + FREE SHIPPING by Newegg.com
Western Digital Caviar Black 640GB 3.5" SATA 3.0Gb/s Internal Hard Drive $64.99 + FREE SHIPPING by Newegg.com
Western Digital Caviar Black 750GB 3.5" SATA 3.0Gb/s Internal Hard Drive $79.99 + FREE SHIPPING by Newegg.com
Western Digital Caviar Black 1TB 3.5" SATA 3.0Gb/s Internal Hard Drives $94.99 + FREE SHIPPING by Newegg.com
3TB Hard Drives!
ATTENTION! THIS DRIVE FOR SNOW LEOPARD OR BETTER ONLY. 32 BIT PLATFORM CANNOT USE THIS HARD DRIVE... YOU'VE BEEN WARNED!
From Newegg.com
From Amazon.com
Western Digital 2500 GB Sata 3.0 Gb-s 64 MB Cache 3.5-Inch Internal Bare-oem Drives WD25EZRSDTL
Video Guide
iMac hard drive removal (upgrade/replace) pt 1
iMac hard drive removal (upgrade/replace) pt 2
iMac hard drive removal (upgrade/replace) pt 2
High Resolution Pictures
Ingredients: Household suction cups, torx screw driver size 8 (set shown), and my Leopard iMac 20"

8 Screws under the screen cover. Torx size 8.

Remove the screws mentioned above, removed the chrome, and you'll see this.

8 screws attaching the monitor to the chassis

(Left to Right) Speaker, circulation fan, RAM, cpu heat sink (I think)

For those of you who forget to mark your monitor cables, this is for you.

First set of cables, looking from the top of the iMac.
Each wire is attached in just below the cd drive.
The wire closest to the outside of the cd drive should be connected
to the dark colored cable from the monitor.
I marked one cable on both ends of the connection with a Sharpie pen.

Second set of cable looking from the side of the iMac you put your CD's into.
For these cables, look in the tight space next to the cd drive. Find the cable that is attached the furthest away from the cd drive. In the picture below, it's the cable furthest to the left. This cable should be attached to the lighter colored cable that comes from the monitor.


This is a picture of the board that the cables are attached to. It is visible by removing the CD Drive. The left most wire is from the last picture. It should be attached to the light colored cable from your monitor. The rightmost cable is from first cable photo (two pictures back) and attaches to the darker cable from your monitor.


This is a picture of everything connected straight into the monitor. The wires are in the same order as above, but the rectangle shaped board is flipped over, the way it would normally sit.


Monitor rear. LG Philips. Make sure the ribbon cable is connected evenly, then run a good piece of tape over the seam where it connects to the monitor (past both ends) to make sure it stays. If your monitor seems 'off' in any way after installation, this is most likely the problem.

The plug on the left (closest to RAM) will need to be disconnected to removed monitor. Reads "LCD TEMP"

Money shot. Good time to dust it out. The cd drive is on the left of this picture. Remove the tape, take out the two screws that connect it to the chassis, remove the two small screws (size 7?) from the rear connector, remove the thermometer. From there you can open the case to remove a badly jammed disc. Remember: if you don't attach the thermometer good the computer will beep when you boot.

The center of the board on the left has a message: CAUTION HIGH VOLTAGE with a symbol next to it. DO NOT TOUCH THAT PART OF THE BOARD WITH ANYTHING. It contains a small stored charged of electricity that is present even when the computer has been unplugged for hours. I touch it with a screw drive and an angry blue spark jumped out at me. Good thing it didn't arch to another spot on the board!

Hard drive thermometer close up, one side is flat, the side shown below is curved. Attach it with the flat side down. Use high temp computer adhesive or some good tape.
I had a request for thermal adhesive information to here is an example:
This product is for your CPU but will also work here. Feel free to find your own high temp, non permanent adhesive (preferably not electrically conductive).

Now opening THIS will void your warranty. As for the rest of the Mac, clean off your finger prints, and save the old hard drive in case you have to fill the warranty. If you do have to fill the warranty, then just put the old hard drive back, attach the thermometer with some real high temp computer adhesive, and swear to God you never touched it.

Yes, it will turn back on if you take care to put everything back properly. The 'beeps of death' made me think I broke my imac. It was actually just the hard drive thermometer not attached well.
newegg.com is much cheaper than amazon
ReplyDeletehi any idea why the monitor looks different after tt? it seems e top part of scr is brighter than lower part.. cld it be e monitor wires?
ReplyDeletehey roy, it is most likely the ribbon looking cable that connects to the monitor. The end that connects to the monitor is very touchy, make sure both sides of the connection are firmly in place, then put a good piece of tape over it so it won't move while you screw the monitor into place. One time I put my iMac back together and the screen had a bunch of funky looking pixels. I just attached the monitor better and that took care of everything.
ReplyDeletewhat do you think about putting a convoy xl with 1 ssd and a 500gig labtop drive in this and just using the ssd as a bood drive and the 500gig for storage?
ReplyDeleteIs there a concern about heat from larger Drives such as 2 GB?
ReplyDeleteDoes the software controlling the fans need to be tweaked?
I have a reply for the convoy xl question on the YouTube comments pages for this video. Don't worry about overheating with large hard drives, they are designed to operate within the same range and their sibling products.
ReplyDeleteI did replaced the hard drive from 320GB to Seagate
ReplyDeleteBarracuda 2TB @7200rpm,work great, But I have a problem with the DVD ,I insert a dvd and It does Not eject.I had to remove the cover to properly eject the dvd. How do you resolve this problem.
Need assistance.
Thank you,
Ralph
This tutorial is a very good deed in deed!
ReplyDeleteBefore screwing bezel back on, I had the intuition to plug in to make certain the iMac would power up.
It didn't. I type this just as I am about to open the thing back up again.
What might I have left unplugged or (gulp) unplugged or broke by accident that would have left the rig dead?
http://www.misco.co.uk/applications/SearchTools/item-details.asp?EdpNo=304214&CatId=3097
ReplyDeleteBeing in the UK, Newegg is no good for me. Is that drive (link above) any good? Looking to order Monday for Tuesday night replacement, my Mac is almost useless because the HDD is on the way out :(
Yep, it's now dead. Cant boot or anything. Have a WD Caviar Green 750GB 32meg on the way, will replace and feed back info. Now going hunting for suckers. :)
ReplyDeleteThanks heaps for this post, I managed to install a WD Caviar Black 500gb 32mb drive today with no issues. All went smoothly and my iMac is now cheerily asleep after a long couple of hours of restores and updates.
ReplyDeleteMy HD is going, but lasted 3 years. Going to replace it but stupid question. How did you copy MAC OS over to new HD?
ReplyDeleteTimothy,
ReplyDeleteTo copy your current drive image over to new hard drive:
1.Connect new drive to a usb/firewire enclosure.
2. Start your Mac from the Install DVD. (Insert the disc, and hold the C key.) Select your language. Do not start an installation....
2. Choose Disk Utility from the Utilities menu and create a osx partition on new USB connected hard drive.
3. Select your current disk partition and click restore tab.
4. Drag existing partition as Source and the new partition as a Destination then click Restore.
5. When done take new disk out of enclosure and install in the mac. Done!
Hamilton: I picked up the same Barracuda 2TB drive at Fry's yesterday. I know I can't use the full SATA3 capabilities on my 24" iMac, but it should still be fast with a 64MB cache. Any concerns about heat from this drive?
ReplyDeleteHey everyone, thanks for all your great comments. I haven't had much time to get on, but I see you're helping each other, that's great!
ReplyDeleteTomSouth: Your new hard drive should be around the same temp as the old one because it's the same rpm's, meaning it doesn't really work much harder, but has the extra cache for better performance. Maybe in the future if you fill the 2TB and have files scattered across it, it will take a hit in performance or possibly heat. I think you won't have any problems. Let us know.
I'm getting ready to plunge into this, I'm wondering if the WD1501FASS (Cavior Black 1.5 t) runs too hot for the v7.1 iMac. The comments on Newegg are that it runs hot.
ReplyDeleteI have to say this is a great site for upgrading an iMac, thanks for putting it up.
Maybe I should read all of the comments before I ask a question already answered. Once again, thanks for the instructions...
ReplyDeleteThanks a lot man. The original 500GB WD was fried, just got the back up in time. The new Hitachi 1 TB is running like a charm.
ReplyDeleteMany thanks for the vid and pix. Turned a potentially 2 hour endeavor into just a little over 30 mins, with no setbacks, and smooth recovery. Also, excellent recommend on the Western Digital Caviar Green 500GB 3.5" SATA 3.0Gb/s Internal Hard Drive. Smoking data transfer rates, and so far, stable.
ReplyDeleteAn additional post - shout out to NewEgg.com for ridiculously fast shipping, great pricing, and hassle-free ordering process.
ReplyDeleteHELP i labeled the lcd wires i have a red/ black & a blue/black wire coming off the lcd. the tape fell off and now i dont know where they go. I looked on your blog and see where they go.
ReplyDeletewhat happens if they are connected wrong?
on my imac mobo all the inverter wires are blue, can i just follow your instructions?
ReplyDeleteImac is a 20" Al model
Totally resurrected my iMac. Looks a heck of a lot harder than it is. Plus a waaayyy better drive than stock. Kudos.
ReplyDeleteThank you so much for posting this. I saved myself $150 in labor and 8 days waiting.
ReplyDeleteThank you for taking the time to share the teaching. Very helpful.
ReplyDeleteI change the 320g to 1T Hitachi and plug back everything and power on.
Imac looking for a file to start, so I drop in a Snow L CD that I upgraded 2 mths ago and it started to install.
Can't find the new drive, so I try Utility to partition as 1 partition and the drive been formated. Exit Utility on the top left hand of the screen.
Continue OS X installation to new 1T HDD.
Restart computer as per screen request.
After welcome screen I selected restore from time machine.
it took 3.5 hrs.
Really Thanks for the tips, very helpful.
Thanks for the post and video. The connections on the back of my LCD were different: LCD temp and two ribbon connections.
ReplyDeleteAnd an other thanks. Installed a 1T WD into my iMAC. Took 4 hours beginning to end which included the restore off the time machine. Loads of disk now and a faster machine. Thank you.
ReplyDeletei had an apple iphone and it had battery problem. i want to get it repair. so, can you please tell me the exact location where it is situated in hyderabad?
ReplyDeleteimac repairs